Tutanota
The goal of this article is to set up a custom email address/domain using Route 53 and Tutanota. Using Totanota as an email server will allow us to send and receive custom domain emails easily through the Tutanota web interface or app.
I won’t go into too many details of why I like Tutanota, other than to mention it is quite affordable for this purpose – €1 per month – and its security features are quite attractive.
I’ll demonstrate using the AWS console for simplicity’s sake.
I assume you already have a domain registered through Route 53.
Using the Tutanota web interface, navigate to Settings » Global Settings then click the + icon under Custom email domains.
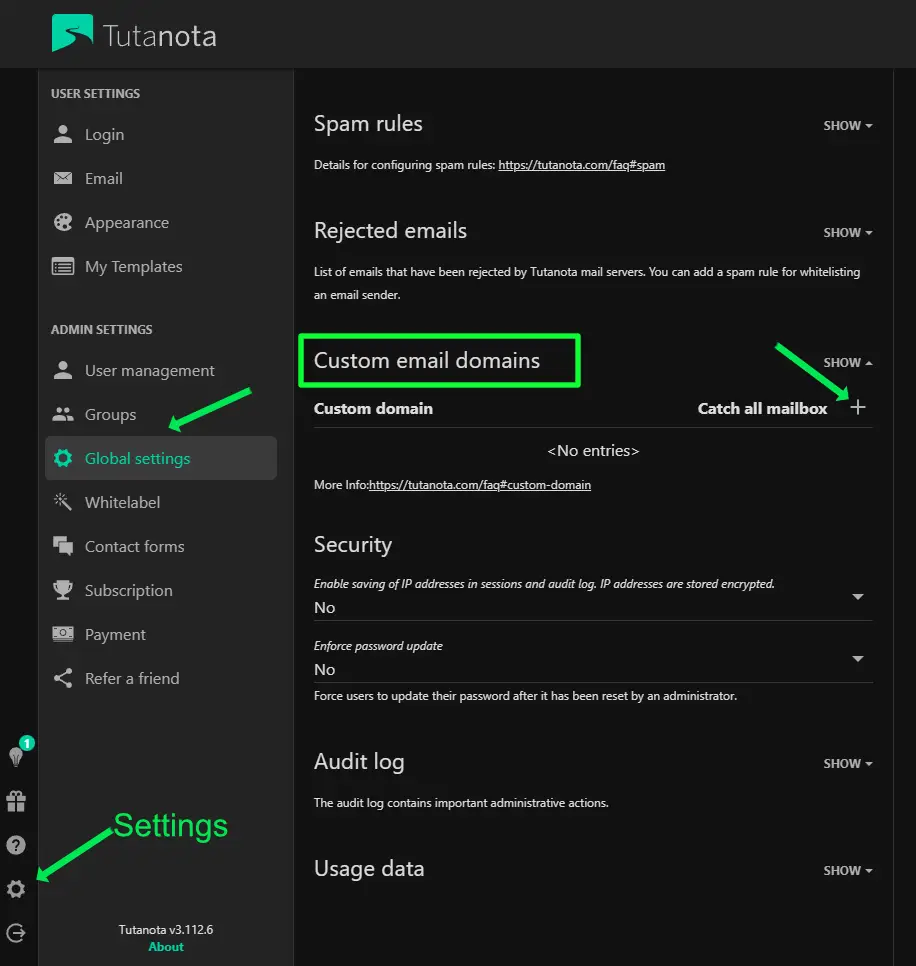
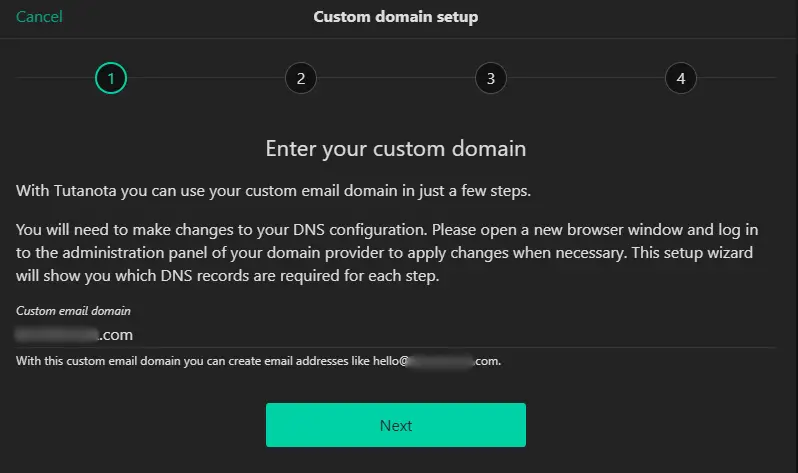
Add your root domain name (e.g., mydomain.com) and click Next.
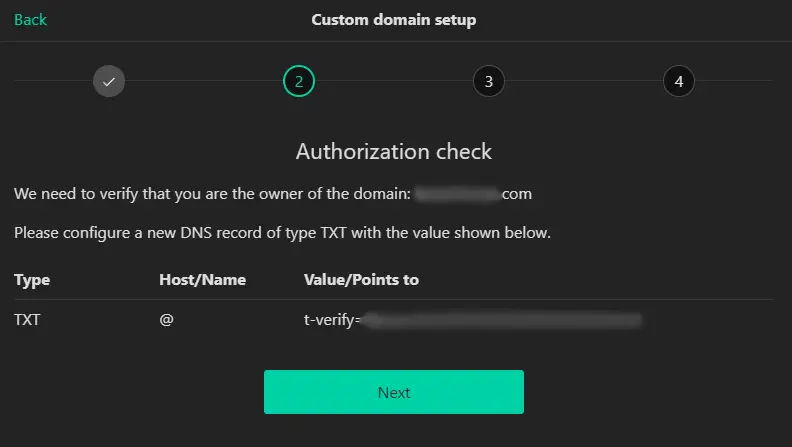
You should be on a page where a TXT record is visible.
Route 53
Open the AWS console and navigate to Route 53 in another tab to add the legacy TXT record.
After you navigate to Route 53 » Hosted zones, select the appropriate hosted zone (i.e., root domain in this instance). Click Create record.
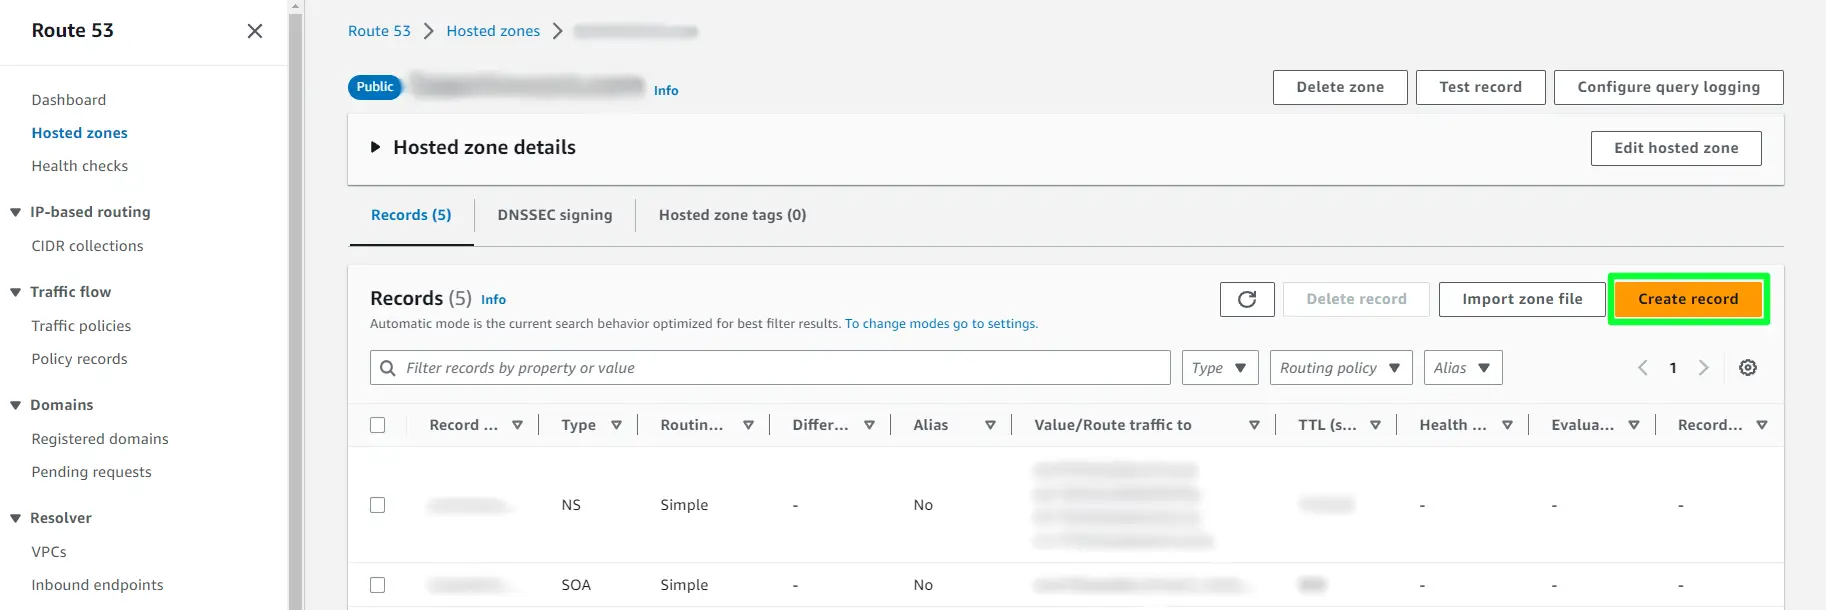
You’ll be prompted for a routing policy; select Simple routing. Click Next and then click Define simple record.
Leave the subdomain field blank, select the TXT record type from the drop down menu, and leave the option of IP address or another value, depending on the record type selected from the Value/Route traffic to drop-down menu.
Add the string starting with t-verify= from the Tutanota Custom domain setup wizard from earlier into the value box.
Finally, insert a TTL value of 1800 or 3600. Click Define simple record then Create record on the next page.
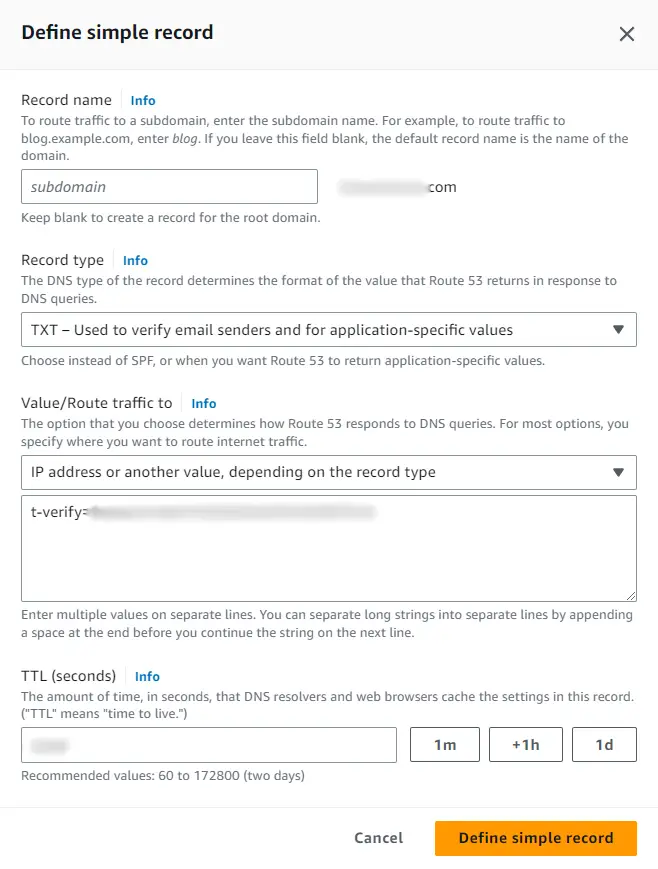
You should now see the TXT record within the specified hosted zone.
Set the Remaining DNS Records
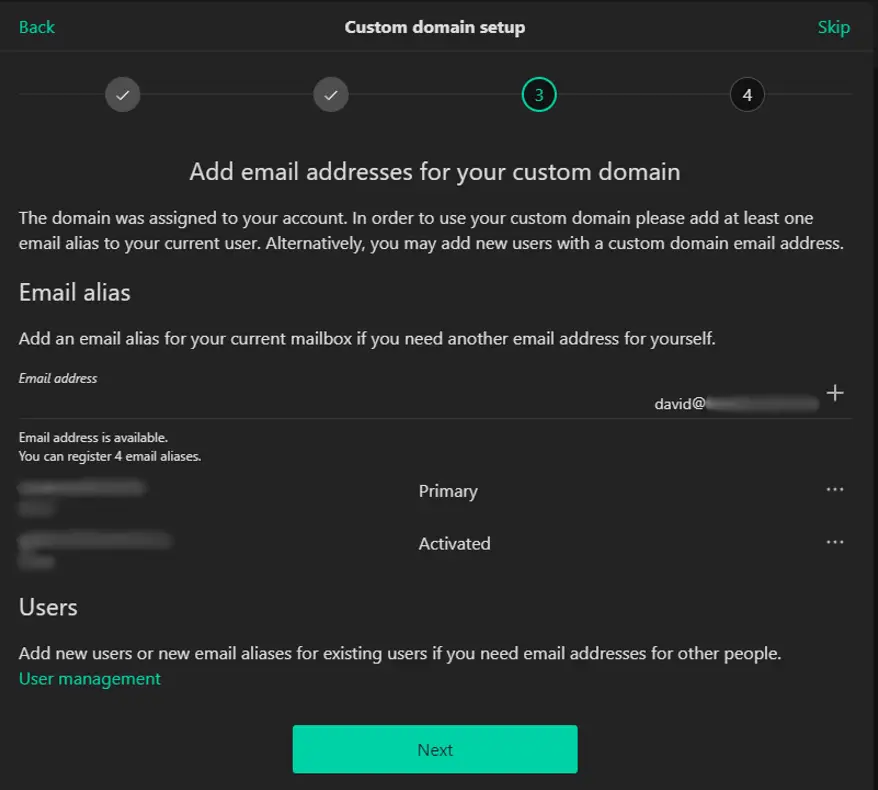
Back within the Tutanota Custom domain setup wizard click Next. On this page, you can add a specific email alias (myalias@mydomain.com). Remember, you are limited on the number of aliases you may have and they can only be deactivated, not deleted (at this time).
On this next page, you’ll see all the DNS records that may or may not have been added through your DNS provider (indicated by a check mark or X, respectively). For each record marked with an X, go through and add the records to your DNS provider’s hosted zone as shown previously. You can use the Tutanota refresh icon on this page to see the status of each entry as they are added to Route 53.
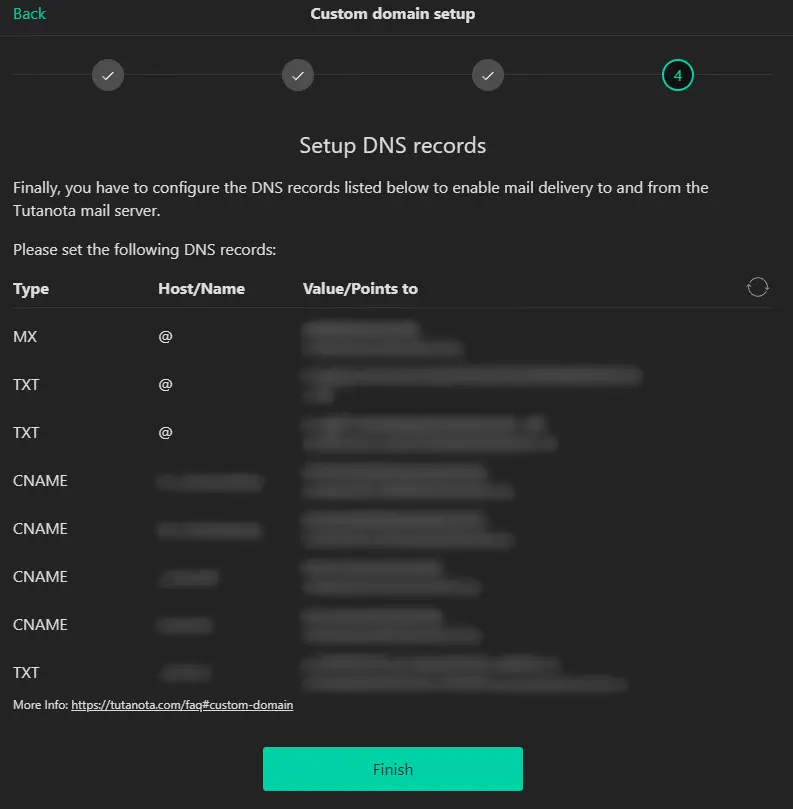
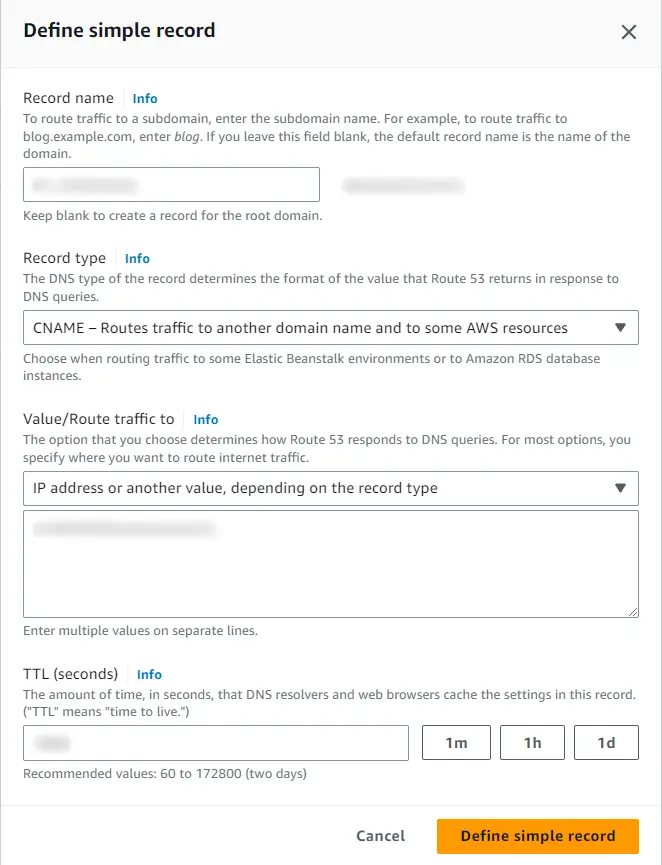
Please note, the middle column of the DNS records provided by Tutanota indicates whether the root domain is used (indicated with the @ symbol), or if an entirely new record must be created and a subdomain used. See the below image for adding a CNAME DKIM record as an entirely new record.
For MX records used in Route 53, you need to specify a priority preceding the name of Tutanota’s mail server (e.g., 10 mail.nameofmailserver.com). With only one MX record, priority does not matter. A second MX record would be used as a backup.
The SPF TXT value is added in the field box as new lines and in quotes. For example:
value1=example1
value2=example2
Here are some suggested TTLs for the following record types:
- MX – 3600 to 86400
- TXT (including SPF & DMARC) – 1800 to 3600
- CNAME (MTA-STS & DKIM) – 1800
Back within the Tutanota Custom domain setup wizard click Finish.
That’s it! You can now send and receive emails from any of the email addresses you wish to define for that custom domain.
In this next article, I’ll show you how to send emails through your custom domain using SES.