Email Automation Using SES
The goal of this article is to set up a custom email address/domain using Simple Email Service (SES) and Route53. Using SES to send emails is beneficial when automating email notifications.
I’ll be using the console for simplicity’s sake.
I assume you already have a domain registered through Route53, so we can skip straight over to SES.
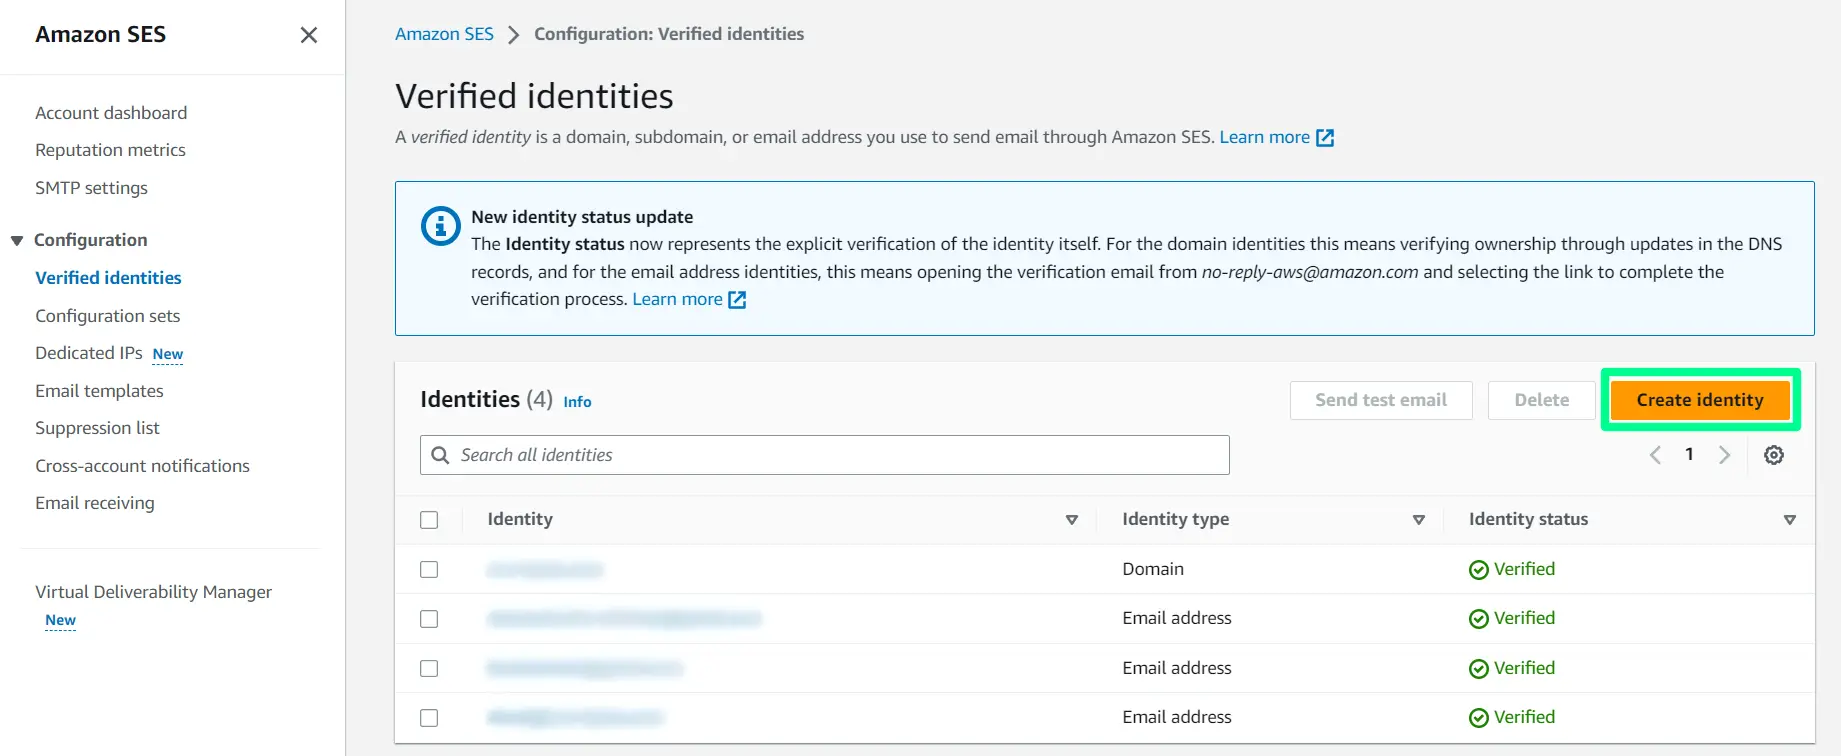
SES – Verify Root Domain
The first step is to verify the root domain in SES. Navigate to Verified Identities » Create Identity
Select the Domain radio button and type in your root domain (e.g., example.com).
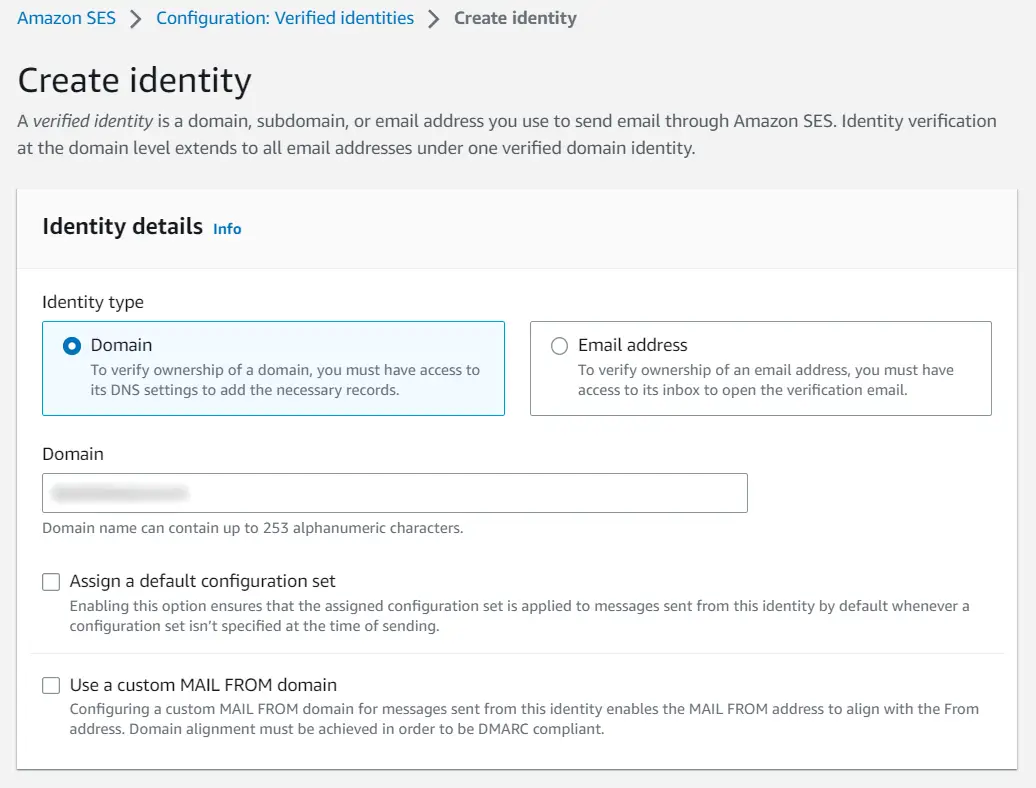
We will leave all other options at defaults.
- Configuration sets may be altered later; leave unchecked for now
- Uncheck
Use a custom MAIL FROM domain - Easy DKIM is selected with the default RSA_2048_BIT key length
- Check the option to
Publish DNS records to Route 53as well asDKIM signatures
On the SES » Configuration: Verified identities » example.com page that opens, you should see the CNAME records. If you are using Route 53, these records should also be present within the specified hosted zone (i.e., root domain). You will also see a notification to add these CNAME records to your domain’s DNS provider, which only applies if you are using another DNS provider or you unchecked the option to Publish DNS records to Route 53.
If you followed the last lesson titled “Custom Email Domain – Tutanota & Route 53”, you will now have two sets of CNAME records – one set corresponding to Tutanota’s mail servers and another set corresponding the SES’s mail servers.
SES – Verify Email Address
The next step is to verify the new email address in SES. Navigate to Verified Identities » Create Identity. However, this time we will select the Email address radio button.
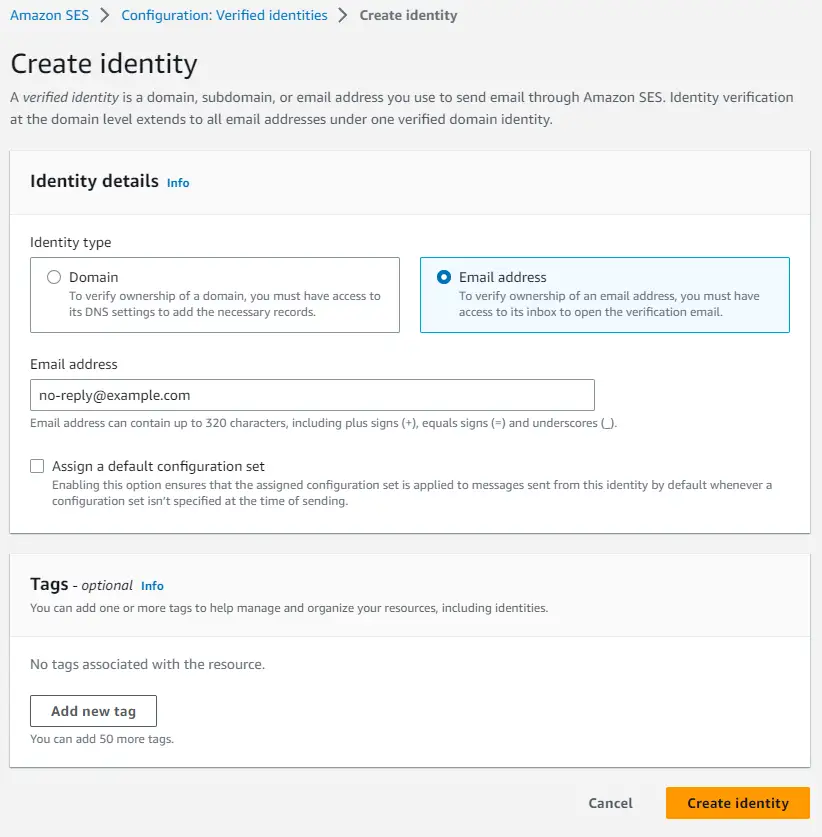
Like mentioned at the beginning of this article, we are setting up a no-reply email for automation purposes. Type in the your chosen email address and leave the other settings at their default value.
On the page that loads, you’ll notice you need to verify this identity by clicking on a link in the specified email’s inbox.
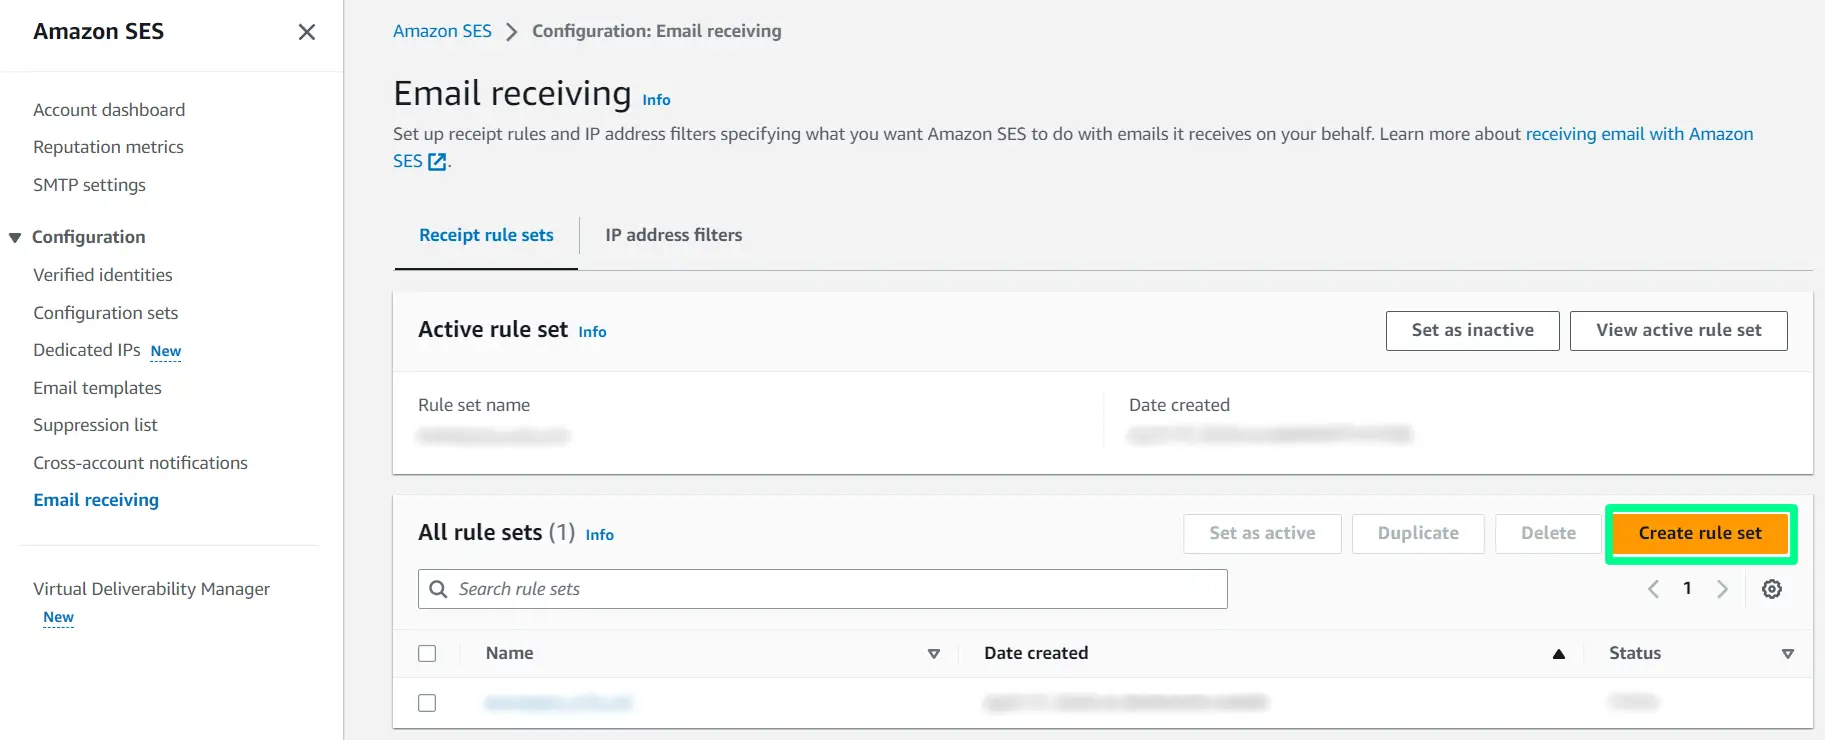
SNS Topic & SES Email Receiving
The easiest way to verify a SES identity is to use a Simple Notification Service (SNS) topic then subscribe to this topic with another email address. Before we do this, we need to first create an email receiving rule set and rule.
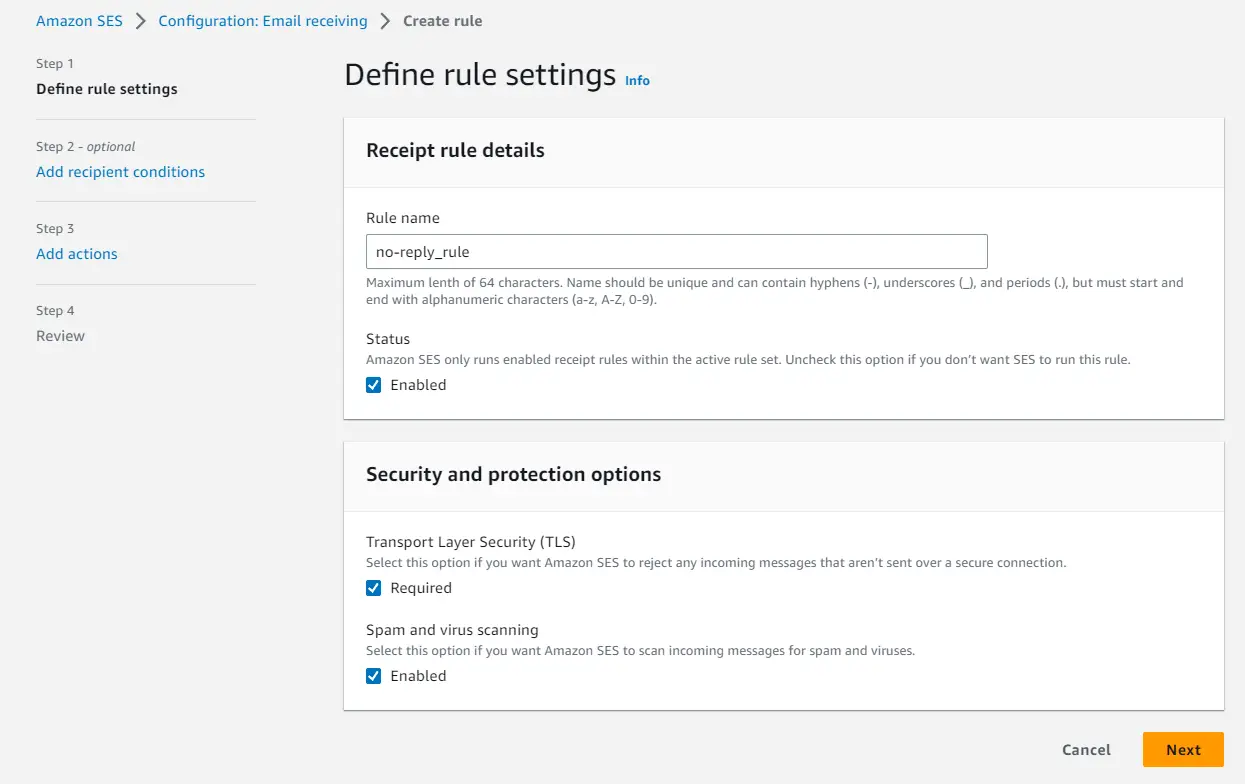
Navigate to SES Email receiving and click Create rule set. Think of the rule set as a container to hold rules; call it what you wish.
Within the selected rule set, click Create rule, and give the rule a name. Select all the options as shown below and click Next.
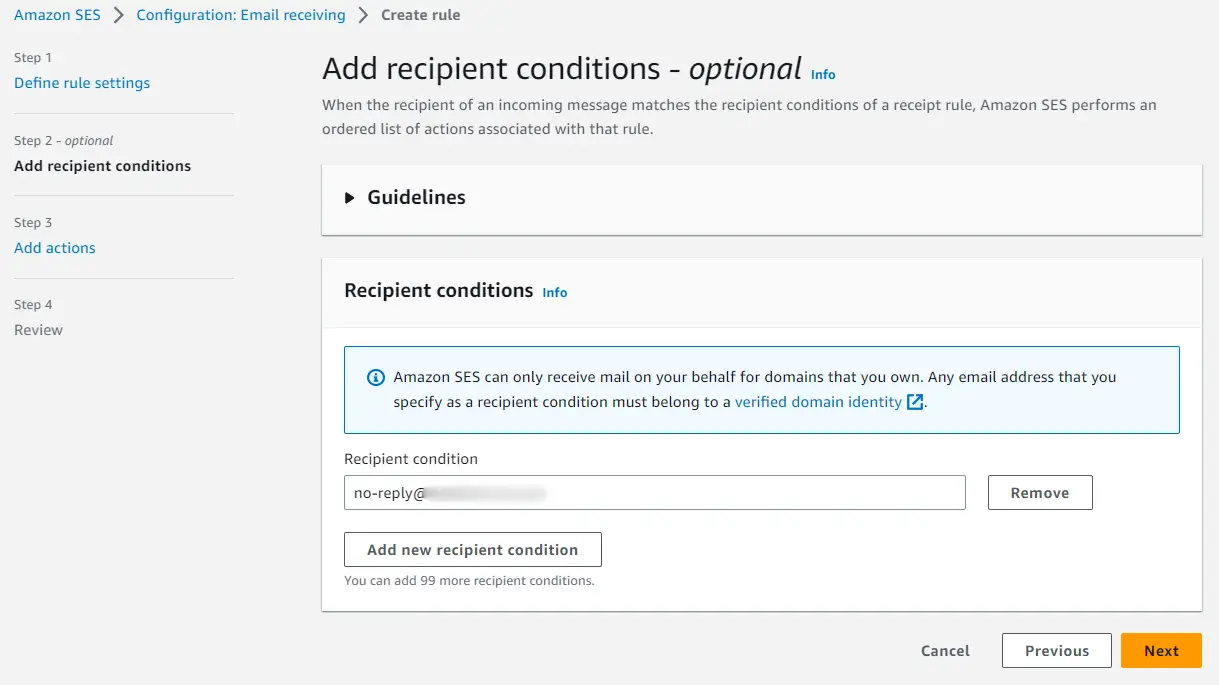
On the next page, you need to specify the email address you are verifying in SES and click Next.
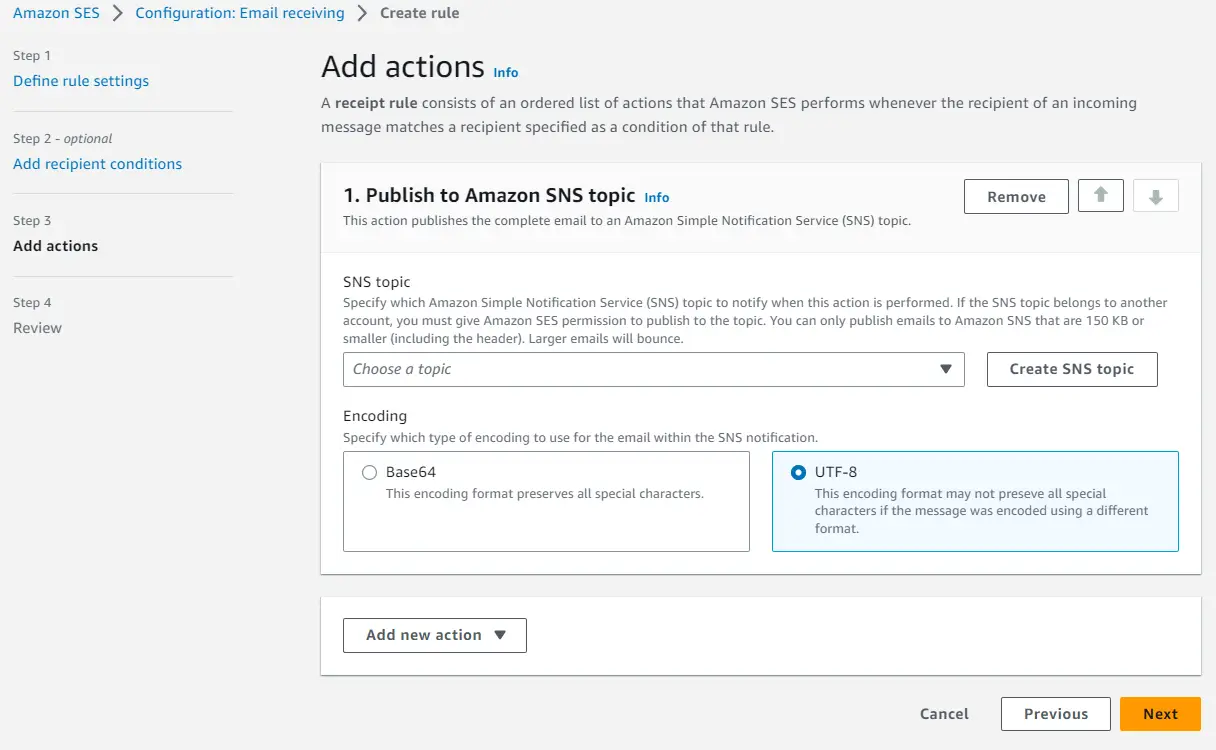
On the next page, you will select the option to Publish to Amazon SNS topic. On the page that loads, click on the UTF-8 radio button and select Create SNS topic. You can change it the option to Base64 at any time, but your data will be encoded. Give the topic a suitable name and click Next. Don’t worry, we’ll subscribe to the topic later with an email address of our choice.
You should be presented with a review screen; review and click Create rule.
Now we need to verify a personal email so it may act as a subscriber to the SNS topic we created. This process is very similar to how we created the identity for our no-reply email. Navigate to Verified Identities » Create Identity. Select the Email address radio button and type in a personal email address or one you are actively using to send and receive emails.
SNS Subscription
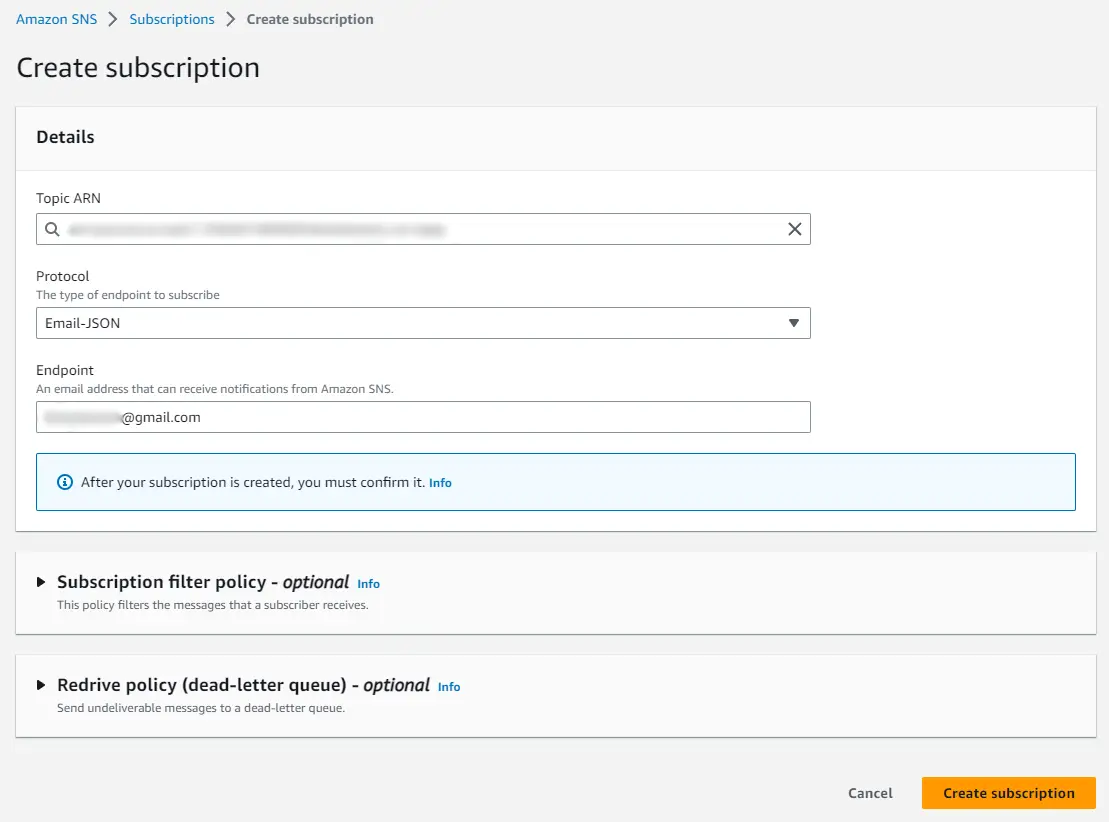
Navigate to SNS » Subscriptions and click Create Subscription. Select the ARN of the topic you created a moment ago, select Email-JSON as the protocol, and type in the name of the personal email you verified a moment ago. Click Create subscription.
Back on the SES » Verified identities page, you’ll see the status of the no-reply email created earlier as Verification pending.
Wait…we never received the SES verification email. We did receive a Subscription Confirmation email, but this is only notifying us that the personal email has been subscribed to the topic we created earlier. Go ahead and confirm the topic subscription.
There are two potential problems:
- The rule set you created earlier, located at
SES»Email receiving, isn’t set to active. This is an easy fix: select that rule set and clickSet as active. - The MX record isn’t set correctly. If you created an MX record for Tutanota as described in the previous article, you will need to temporarily (more on this in a minute) delete that record and create one for SES. Another option is to create a separate hosted zone for a subdomain and set an MX record for this subdomain.
To set a new MX record navigate to Route 53 » Hosted zones, select your hosted zone, select the MX record, and click Edit record. Add/replace the MX record with one of the applicable SES mail servers:
10 inbound-smtp.us-east-1.amazonaws.com
10 inbound-smtp.us-west-2.amazonaws.com
10 inbound-smtp.eu-west-1.amazonaws.com
SES Email Identity Verification
Head back to your SES no-reply (or whatever you defined it as) identity and click Resend at the top right of the screen. The verification email is a Receipt Notification email. In other words, the JSON content of this email contains what we need. Carefully extract the text beginning with https://email-verification and open this in another browser tab.
The verification page should appear like so:
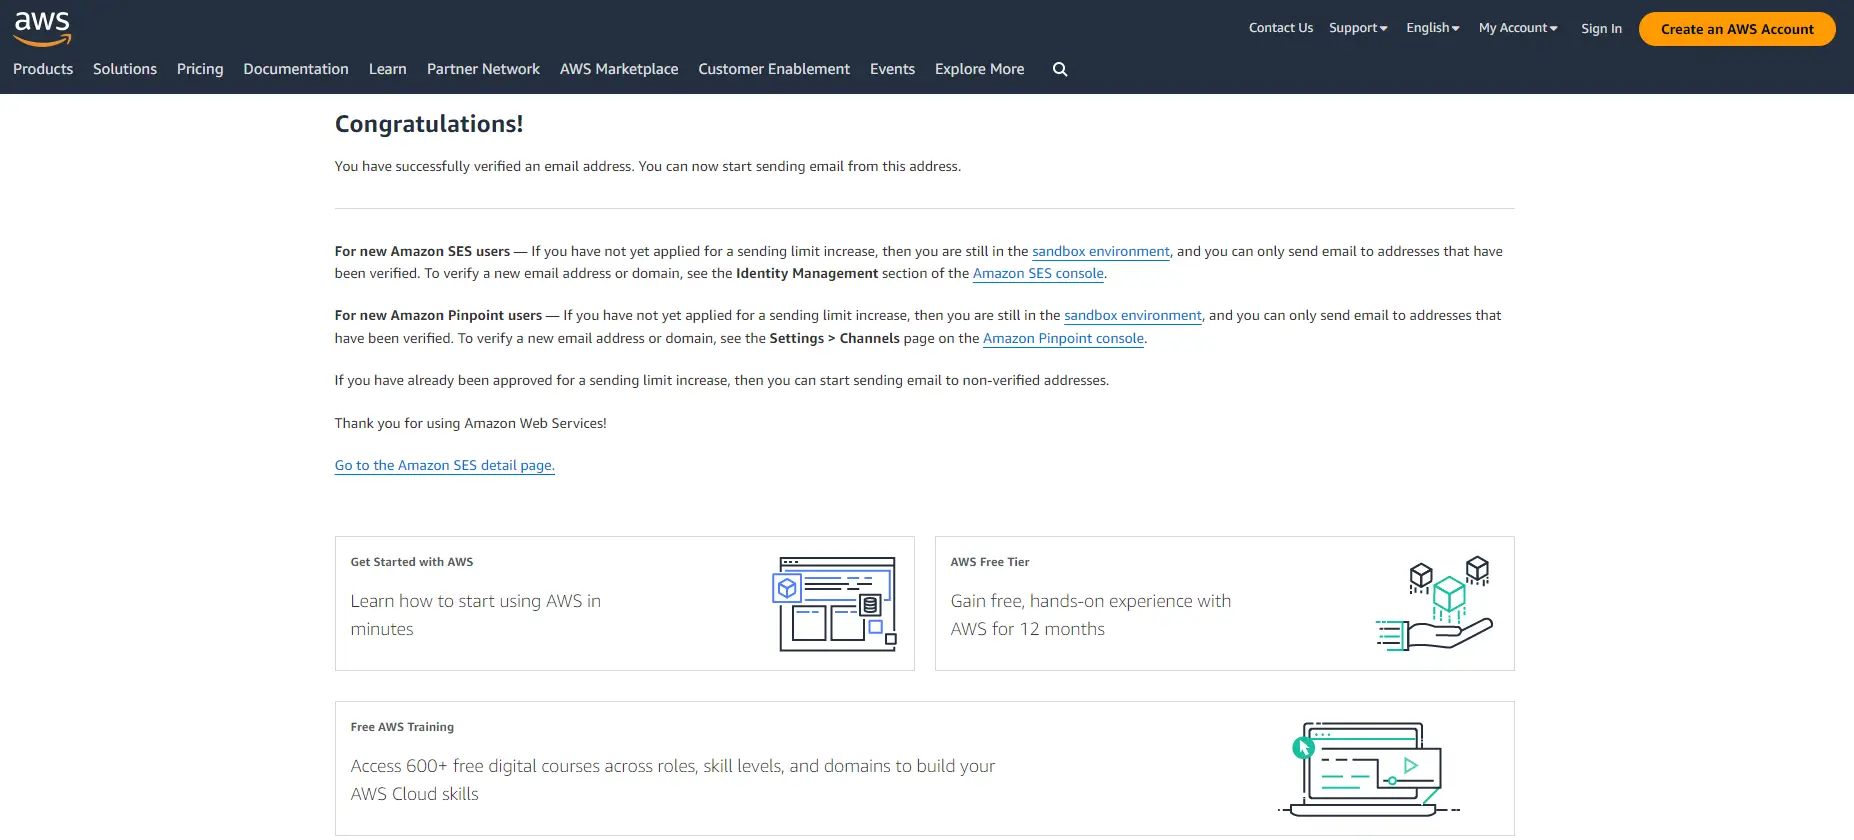
When you click on Verified identities in SES, you will see the email is now verified.
Discussion & Conclusion
Before we forget, go back and change your MX record back to what it was, unless you never had one and this was the intended purpose. I’ll explain in a bit. Also, navigate back to SNS » Email receiving, select the rule set created earlier, and click Set as inactive. We no longer need this rule set because the email is verified, unless you intend on receiving more emails to the verified email address.
There are a few things we need to consider at this point.
Most importantly, when you verified your root domain in SES, you actually verified all subdomains and email addresses in the process. This is proven by the fact that even though I could not receive the verification email, I could still send emails using the Send test email button in SES before this email address was explicitly verified. You can see amazonses.com as the mailed-by value while my domain signed the email (as long as you had an SES MX record).
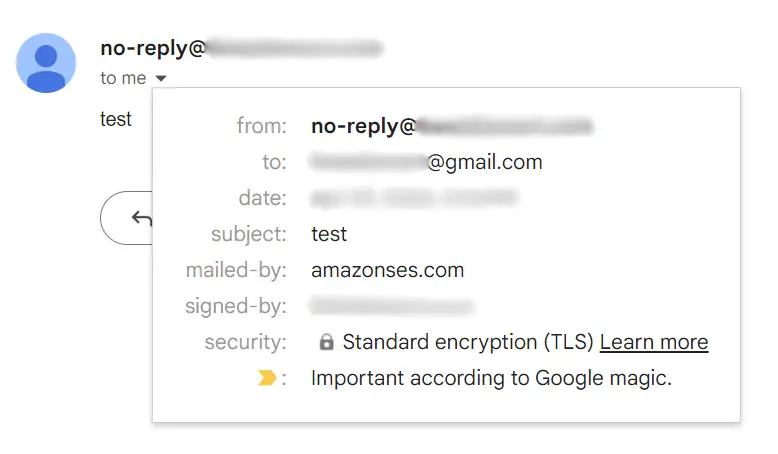
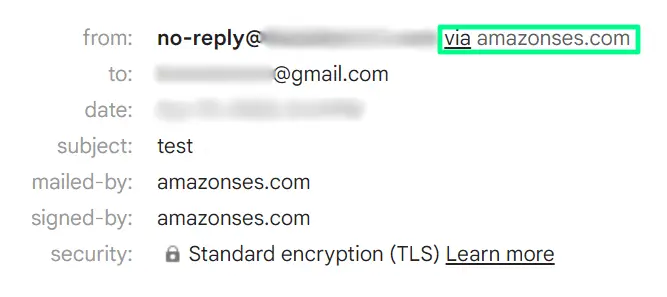
If you don’t have an SES MX record, the email information will look like the following, and the emails will likely go into the target’s spam folder:
Finally, if you look at your Account dashboard in SES, you may notice your SES account is in a sandbox, meaning you can only send emails to verified identities. The process for bringing your SES account out of a sandbox is simple yet out-of-scope of this article.
We covered quite a bit in this article with many potential solutions for our customers.
If there is one thing you got from this article, I hope it is this: receiving an email intended for a domain email address requires an MX record tied to the email’s domain. However, no-reply email addresses are designed not to be replied to 😏.
I hope you found this information useful!